> For the complete documentation index, see [llms.txt](https://docs.dingdoong.io/llms.txt). Markdown versions of documentation pages are available by appending `.md` to page URLs; this page is available as [Markdown](https://docs.dingdoong.io/general-settings/how-to-add-date-and-time-to-thank-you-page.md).
# How to add date and time to Thank You page?
To add date and time to your **Thank you page,** please follow **3 steps** below:
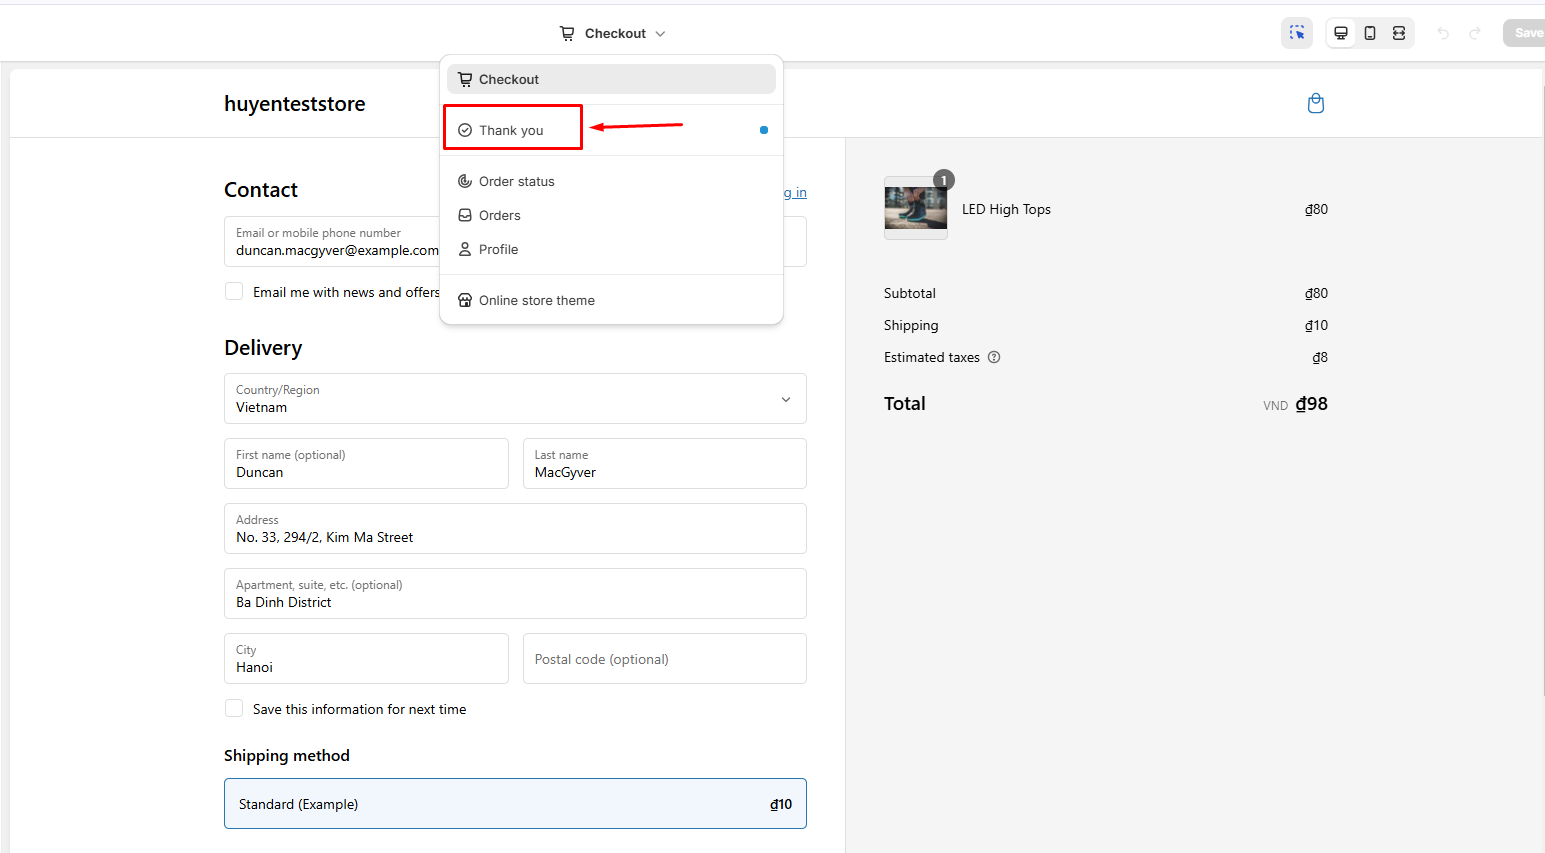
**Step 1.** Go to **"Settings"** section of Shopify, choose "**Checkout"** and click "**Customize"**
**Step 2.** In **"Checkout page",** choose **"Thank You"** page
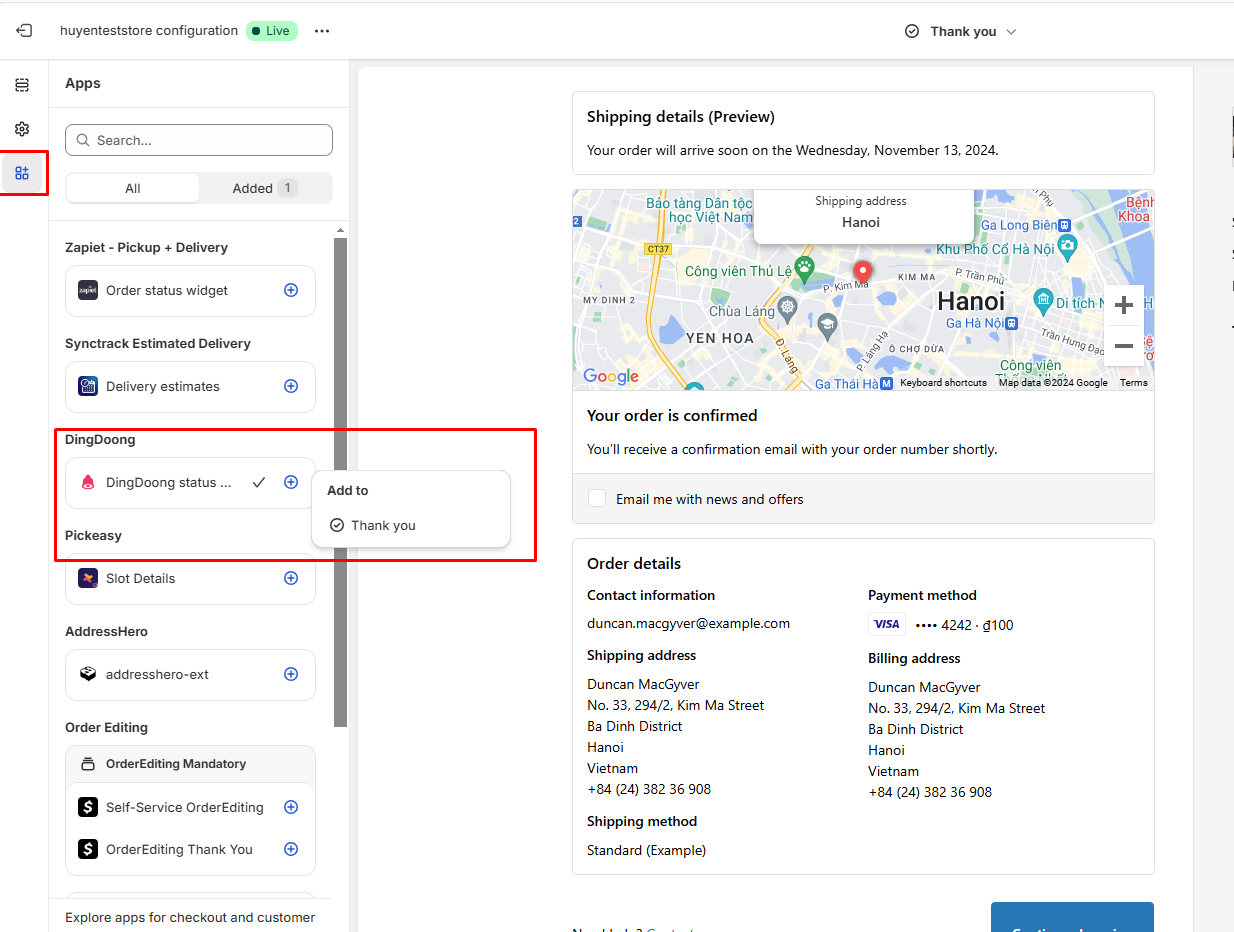
**Step 3.** In **"Thank You"** page, choose **"Apps"** and then choose **DingDoong** and **"Add to Thank You page"**
As a result, when customers select a date or time, it will **appear on the Thank You page** like this: